SEO Image Optimization: Unleash the Power of Visuals

In today’s digital world, just words won’t cut it anymore. Whether you’re blogging about your hobbies or sharing school tips, adding pictures can really spice up your posts. But it’s not just about throwing in any old picture – you’ve gotta use them the right way! That’s where our SEO image optimization guide comes in.
Making sure your pictures look good online is key for successful SEO. That means making them smaller so they load quickly, adding tags, and picking the right kind of picture. Here’s a simple guide to help you make your blog posts stand out with awesome pictures!
Why Image Size Matters in SEO
Did you know that images take up the most space on web pages? This means that images are crucial in determining how fast your webpage loads.
According to Google, you want to shoot for fewer than 500 KB in terms of webpage size. Lower page weight means faster page speed and happier prospects. So, keep those web pages trimmed and lean!
Each second of page load time will increase the number of visitors who LEAVE your website. As reported by Google, three seconds is the best practice for page speed, by the way. At that speed, most visitors will likely remain on your website.
SEO Image Optimization Tips
Use images to break up text
Pictures aren’t just pretty additions – they’re like helpers that make your writing easier to understand. Just how we break up big chunks of writing with paragraphs, we can also use pictures to help explain things better. The more words you have, the more you should think about adding pictures to keep things clear. You don’t want readers to feel overwhelmed by a giant block of text.
Use high-quality images
Choosing blurry or fuzzy pictures is almost like not using any at all. Think about it: when you come across a website with unclear images, do you stick around or look for a site with better pictures? Plus, if the creator didn’t take the time to use good pictures, the writing might not be very good either.

Optimize images for performance
You must compress your images to avoid losing customers because of a large and slow website. But first, run some performance tests using Google’s Page Speed Insights.This tool shows you your website’s weaknesses and how to eliminate them. You’ll also see which images take up the most space and how much you can reduce them.
Compressing images for your website is easy. If you’re using WordPress, the Smush WP plugin is all you need for image compression. The plugin can automatically “smush” images you upload, reducing them to acceptable sizes while preserving their quality.
You can use free tools such as compressor.io and Compress JPEG on the web. Just upload your images, individually or in bulk, to drastically resize them. Once again, the quality of your images won’t be altered. Neat, right?
You can also resize images for the web through Photoshop. Just go to File > Export > Save for Web when saving files. You’ll see resizing options and other online image optimization features in the window that opens up.
Use images legally
Using any image you want from the Internet could end badly for you. Copyright infringement occurs frequently because some people don’t respect the rights of intellectual material. Most images fall into these categories:
- Rights managed – purchased for a single use.
- Royalty free – free to use, but you can’t resell or edit it.
- Creative Commons – free to use, but attribution to the creator is required.
- Public Domain – free to use and attribution is not required (you can find these on Wikipedia).
Shutterstock is a great place for buying high-quality stock images. If you don’t want to pay for images, use a website that provides public domain images, like Unsplash.
Take advantage of screenshots
Screenshots are essential in articles explaining how things work, such as how-to guides. They allow you to make your point across more clearly. Both OS X and Windows provide simple tools for taking screenshots of parts of your screen.
Add explainer images
Sometimes, text alone doesn’t do a good job of explaining complex ideas. When you need to clarify concepts, use diagrams, pie charts, and/or infographics. You can find several free tools on the web for creating visual aids, such as OmniGiraffe for diagrams.
Make your own images
Can’t find images that suit your blog post? If Photoshop isn’t your thing, try creating images with free tools. Canva is a widely used image-creation tool that provides a huge repertoire of design templates. Making your own images also gives you the opportunity to add unique and branded content to your blog.

Alt Tags and Captions
Online image optimization includes filling out the tags, caption, and description fields.
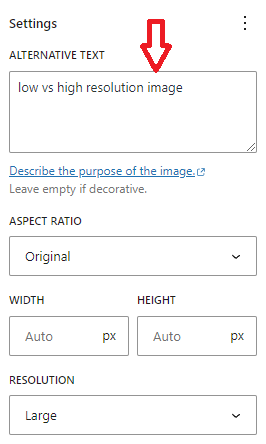
In the alt tag field, briefly describe the image using your targeted keyword. Screen readers for the blind and visually impaired will read out this text. For example, if you have an image used as a button to go to product Y, the alt text would say “button to visit product Y.” You should always add alt attributes to your images for SEO and accessibility purposes.

The title tag is a bit different. It’s shown as a tooltip when hovering over an image. In the case of an image button, the button could contain an extra call-to-action, like “Don’t miss out on this special offer! Buy product Y now!”. Title attributes aren’t as important as alt tags, but they can be useful.
If it makes sense, write captions to tell users something specific about the image. Captions add context to the image. Plus, people tend to read captions a lot (just like on social media).
As for the image description field (on platforms that have them, like WordPress), you can enter as much information as you want. This text can be displayed on the attachment page for your image. Write the story behind a photograph, how you took the picture, etc. You can even add links in the description field.
JPEG or PNG?
JPEGs are the most popular file format online and are perfect for complex images, such as photographs, product images, homepage images, and banners. JPEGs have a huge color pallet to work with and handle these images very well.
The difference between JPEGs and PNGs is that the latter can handle transparency. How does this translate for the web? Well, transparency is mostly used with logos, which are the central part of your brand image. So use the PNG format for logos mostly.
Want to learn more about how you can harness the power of images on the web? Check out the best practices for adding images on your website.
For Professional Graphic Design and Web Design Services, Contact Bright Pink Agency!
In conclusion, by implementing these SEO image optimization strategies, you can speed up your site, improve customer satisfaction, and boost your bottom line. If you need help getting started, our team at Bright Pink Agency is happy to assist! We can create visuals and graphics tailored to your business and in line with your unique brand image.
We have years of experience in SEO and content marketing (including SEO image optimization) and would love to put that knowledge to work for you. Contact us today to learn more about our search engine optimization services and franchise web design and development services.


